BlockBox Virtual Appliance: Deployment guide
Table Of Contents
Requirements
- Networking Requirements
- Network Security Requirements
- Windows Inventory Requirements
- Linux Inventory Requirements
- Apple OSX/macOS Inventory Requirements
- VMWare Inventory Requirements
- SNMP Inventory Requirements
Data Collection Process
- Scanning
- Fingerprinting
- Inventory
Initial Setup
Before proceeding to the Initial Setup section, it is highly recommended to review the following articles:
Blockbox Virtual Appliance: Technical Pre-work
BlockBox Virtual Appliance: Image Setup Guide
Requirements
For the BlockBox appliance to function properly, there are some ‘must haves’ that should be taken care of out of the gate.
Networking Requirements
First off – you or someone with the appropriate access will need to provide a list of the appropriate subnet(s) to put into scope to ‘see’ all devices on the network(s)
- To function properly and be able to access and communicate with your entire environment, the BlockBox must be on a network segment that can route to any and all other segments. If there are unique ACLs on your routers or switches, they must allow the discovery appliance to communicate through to your endpoints.
- Access from the appliance through any network firewalls, intrusion prevention systems or endpoint protection. See Network Security Requirements below.
Network Security Requirements
Certain features of the appliance require a small amount of pre-work. We have endeavoured to create a platform that required zero client footprint – no agents, and no leave-behinds on your endpoints. To make that possible, however, we require the ability to remotely administer these endpoints. Luckily, this is easily accomplished and is a one-time effort.
The salient points are as follows:
- Network-based firewalls or Intrusion Prevention systems must allow communication from the appliance to your endpoints.
- Local firewalls or Endpoint Protection applications must also allow for communication from the appliance.
- The simplest method to ensure connectivity through your Endpoint Protection product, is to add a firewall and/or complete exception from the appliance’s IP address to all endpoints over all ports and through all protections.
- Windows Inventory processes typically communicate over TCP ports 135, 139 and 445 (WMI, RPC, SMB) and UDP ports 137 and 138 (NetBIOS). Windows Inventory communicates over those ports using the following “services” (To ensure these services respond to our inventory, please refer to Appendix 1.2 – Allowing Inventory services using Group Policy…)
- WMI
- Remote Procedure Calls (RPC)
- SMB (CIFS)
- OSX, Linux and Solaris Inventory processes are carried out over SSH (TCP port 22)
- SNMP Inventory processes are carried out over UDP ports 161 and/or 162
- VMware vCenter Inventory process are carried out over HTTPS (TCP port 443)
Windows Inventory Requirements
- We do not expressly require administrative credentials to conduct our inventory, provided we have access to the required protocols and services for Windows inventory (RPC. SMBv2 or SMB v3, WMI)
- Access through any local firewalls or endpoint protection systems to, at minimum, TCP ports 135, 139 and 445 (WMI, RPC and SMB) and UDP ports 137 and 138. See Network Security Requirements above.
- Additional Windows firewall exceptions may need to be set using Group Policy. Our guide can be found here.
- Additionally, if a domain account is not applicable to the assessment (eg. non-domain joined), please refer to the following link to implement a local service account via PowerShell on each device that are intending to be inventoried here
Linux Inventory Requirements
We can inventory almost all RPM-based and Debian-based variants of Linux.
We can also inventory Oracle Solaris and IBM’s AIX.
(Utilization data and performance metrics cannot be pulled from Oracle or AIX)
We cannot inventory the following variants at this moment:
- IBM System i (iSeries/AS400)
- HP-UX
- Gentoo-based Linux
- Slackware-based Linux
- Pacman-based Linux
- Alpine Linux
In order to perform that inventory we require the following:
- Credentials that can access the following resources for *nix systems:
- Files in /proc/
- dmidecode (ideal)
- Credentials that can access the following resources for Solaris systems:
- /usr/sbin/psrinfo
- /usr/sbin/prtconf
- /usr/sbin/smbios (or eeprom or sneep)
- Access through any local firewalls or endpoint protection systems using TCP port 22 (SSH). See Network Security Requirements above.
Apple OSX/macOS Inventory Requirements
- OSX Administrator credentials for inventorying OSX machines
- SSH management must be enabled on the endpoint
- Access through any local firewalls or endpoint protection systems using TCP port 22 (SSH). See Network Security Requirements above.
Click here for more information on how to enable remote inventory on your Mac
VMware Inventory Requirements
- vCenter SSO domain credentials in UPN format e.g. administrator@sso.mydomain.local
- These credentials can also be Windows domain credentials.
- Access through any local firewalls or endpoint protection systems using TCP port 443 (HTTPS). See Network Security Requirements above.
- Read-Only role assigned at the vCenter level and propagated to child entries
- If it is desired to get VMware license details (as populated on the vCenter), simply follow these steps:
- clone the read-only role (for example, to a Block 64 Discovery role)
- edit the new role and add the Global > Licensing permission to the role
- assign that new role to the user account at the vCenter role
SNMP Inventory Requirements
- SNMP v1 or v2c read-only community strings
- SNMP v3 credentials for inventorying the network devices. These would include:
- Username
- Password
- Context
- Security level
- Authentication and encryption protocols
- Encryption key
- Access through any local firewalls or endpoint protection systems using UDP ports 161 and 162. See Network Security Requirements above.
Data Collection Process
BlockBox can collect a detailed inventory of devices on your network. If you already use another solution for inventory management, you can disable the inventory function in BlockBox and import your data using flat files through the Utilities section in the BlockBox GUI.
Should you use the BlockBox to collect an inventory of your environment, information is collected in the following fashion:
1. Scanning:
BlockBox performs a multi-level scan using low-impact TCP SYN requests to detect devices across your specified subnets. The results are consolidated into a list of viable targets with minimal network disruption.
2. Fingerprinting (Optional):
Recommended for most networks except the most fragile ones, BlockBox can perform OS fingerprinting to gather additional information without a full inventory scan. By analyzing device responses to brief TCP and UDP probes, it identifies operating systems and device characteristics. You can disable this option if necessary.
3. Inventory Collection:
Once a device is identified and validated, BlockBox collects specific inventory data based on its type:
- Windows & macOS Devices: Installed software lists, hardware specifications, and serial numbers.
- SNMP Devices (e.g., printers, switches, routers, firewalls): Manufacturer, model, serial number, and full MIB data.
- Linux, Unix, Solaris Systems: Hardware information, package lists, and software-related files.
Initial Setup
First things first! Hopefully by now you have downloaded a copy of the virtual appliance and deployed it on your chosen virtualization platform, and have an IP Address handy that you can assign to the appliance. The first job you’ll have is to, from the console, log into the device.
Console Setup
As noted, you will now want to log into the device to assign the appliance an IP address and network settings. You will see the following prompt:
blockbox login: _
The login and the password are both blockboxb by default, though you will be asked to change this upon your first login. After you’ve successfully logged in, simply type ./config at the prompt to configure the network:
blockbox@blockbox:~$ _ ./config
You will first be prompted if your appliance can obtain an IP address from DHCP:
Configuring BlockBox for first use!Use DHCP to obtain an IP Address? (y/n)
If yes, your work here is done and you will be prompted to reset the appliance which you can do from your virtual host.
If no, you will be prompted to enter your appliance’s network details:
Please enter the IP Address assigned to this appliance: [xxx.xxx.x.xx] 192.168.1.96Please enter the Netmask associated with this appliance: [255.255.255.0] 255.255.255.0Please enter the gateway associated with this appliance: [xxx.xxx.x.x] 192.168.1.1Please enter your Domain Name Server(s) (DNS) assigned to this appliance. Please separate each DNS with a space: [8.8.8.8 9.9.9.9]Please enter your Domain Suffix(es) (DNS) assigned to this appliance. Please separate each suffix with a space: [domain.local subdomain.domain.local]
And that’s it! You will be prompted to reset the appliance which you can do from your virtual host and continue the configuration from the web UI.
Web UI Setup
After configuring the device IP address and resetting the device, you should be able to navigate via browser to the GUI for further configuration. Make sure to use ‘https’ as the IP prefix. You may want to bookmark this page for easy re-visiting once you’ve arrived. The first screen you see should be like this:
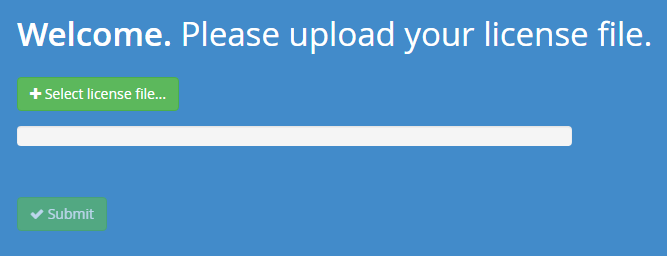
You should have received a license file (“license.dat”) that you can upload using the browser interface. If you haven’t, contact your representative and we’ll get you sorted out right away!
From here, you’ll want to input the credentials you plan to use with the appliance. Make sure you write them down or keep them on hand somewhere!
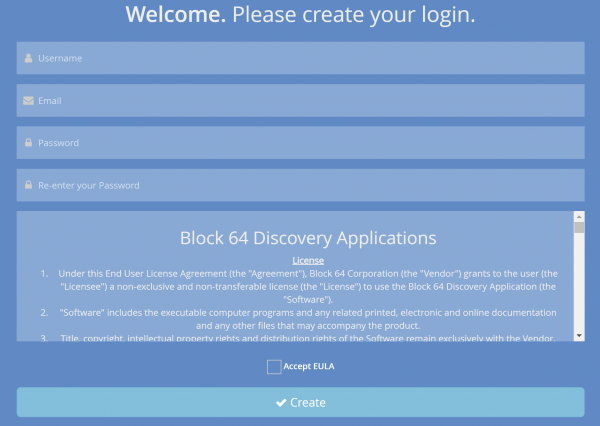
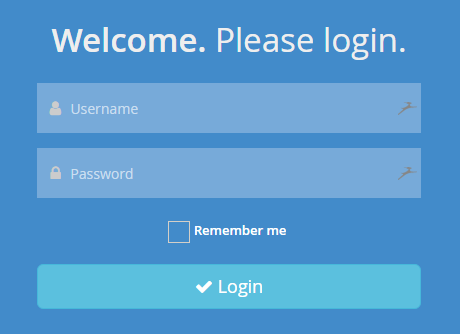
Once created, you be dropped into the login page. Use the credentials you just created to authenticate, and you’re on to the configuration wizard!
Configuration Wizard
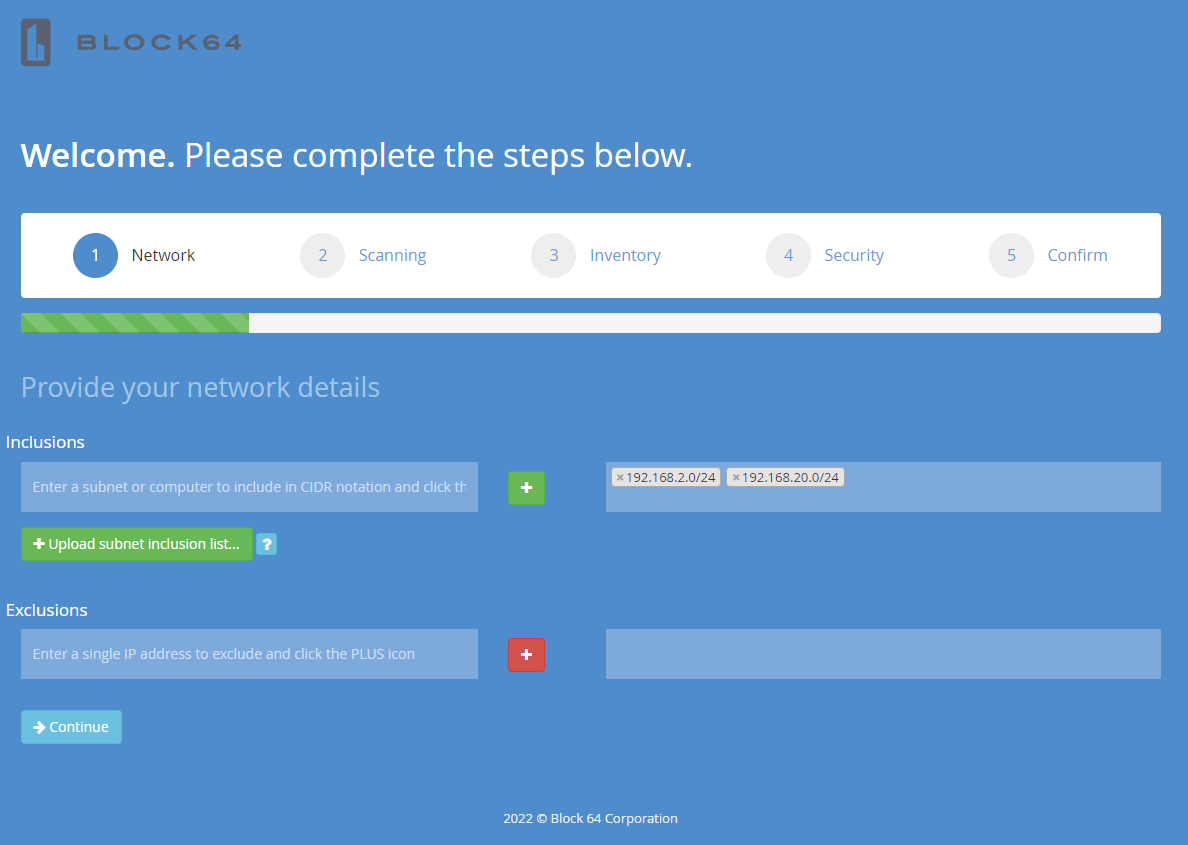
Note: The rule of thumb for entering data into most fields in the Configuration Wizard, is to:
- Enter the value in the field at left
- Click the + (plus) sign to…
- …transfer that value to the field at right
Network configuration
Inclusions
Add network subnets for the scanning process.
-
Best Practice: Enter the smallest possible subnets that cover all endpoints. Avoid using large subnets (e.g., 10.x.x.x/8) unless necessary.
IP Exclusions
Specify individual IP addresses to exclude from scanning and inventory. Common exclusions include sensitive systems like healthcare ER systems or energy control systems
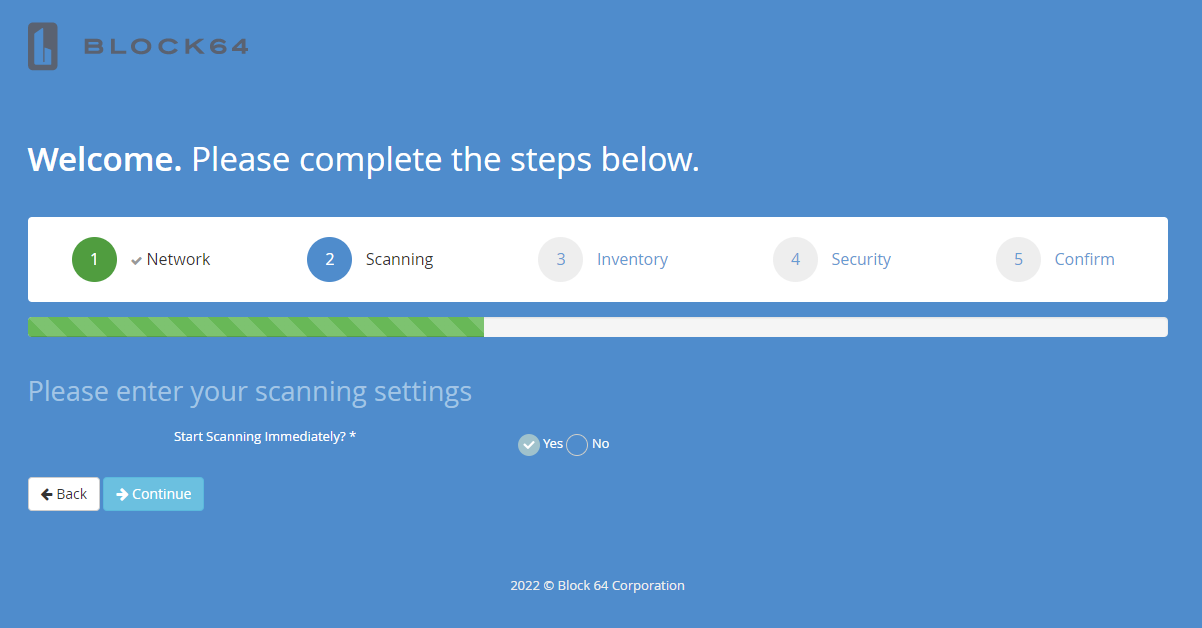
Scanning
Choose whether to:
-
Start scanning immediately (Recommended)
-
Postpone the scan to a later time
Inventory Settings
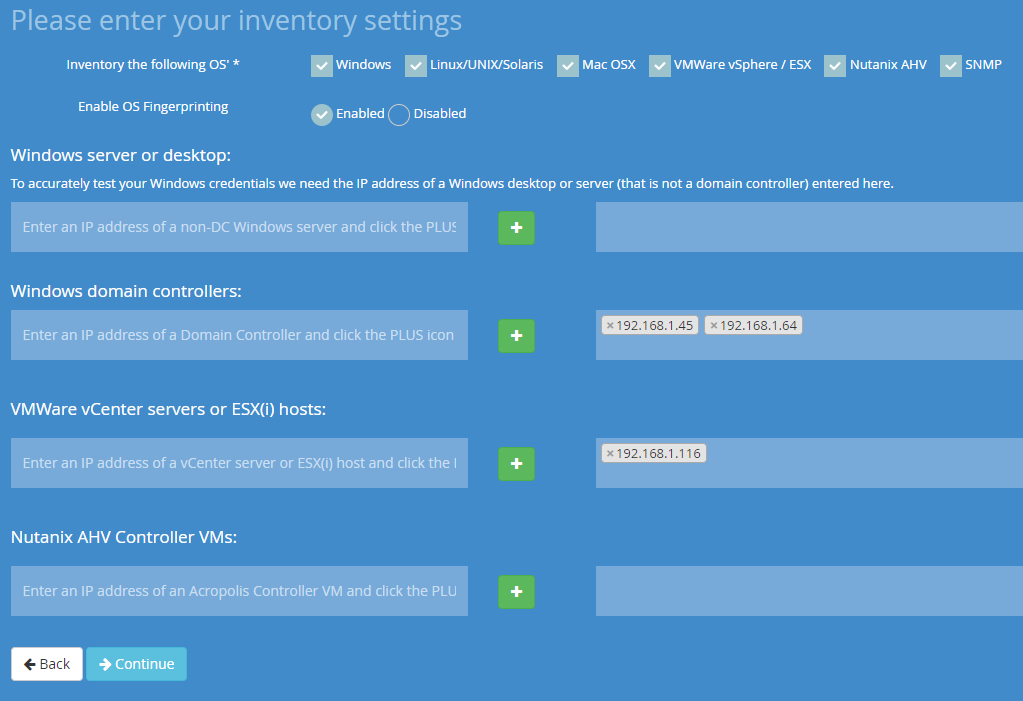
Select Operating Systems to Inventory
Enable or disable inventory for:
- Windows
- Linux/UNIX/Solaris
- OSX
- VMware
- Nutanix
- SNMP Devices
Enable OS Fingerprinting (Optional)
Enhance inventory accuracy by using OS fingerprinting technology. This helps identify device types before performing a full inventory. Recommended for most networks except the most fragile ones.
Windows Server or Desktop
Enter a Windows server or workstation IP (not a domain controller) to verify local admin privileges using the credentials added in the Security tab.
Windows Domain Controllers
Provide the IP addresses of your domain controllers, preferably those closest to the top of your Active Directory forest.
VMware & Nutanix AHV
-
Enter your vCenter Server IP for VMware environments.
-
If no vCenter is available, enter the IP addresses of your virtual hosts.
-
For Nutanix, follow the same process using Controller VM IP addresses.
Security Configuration
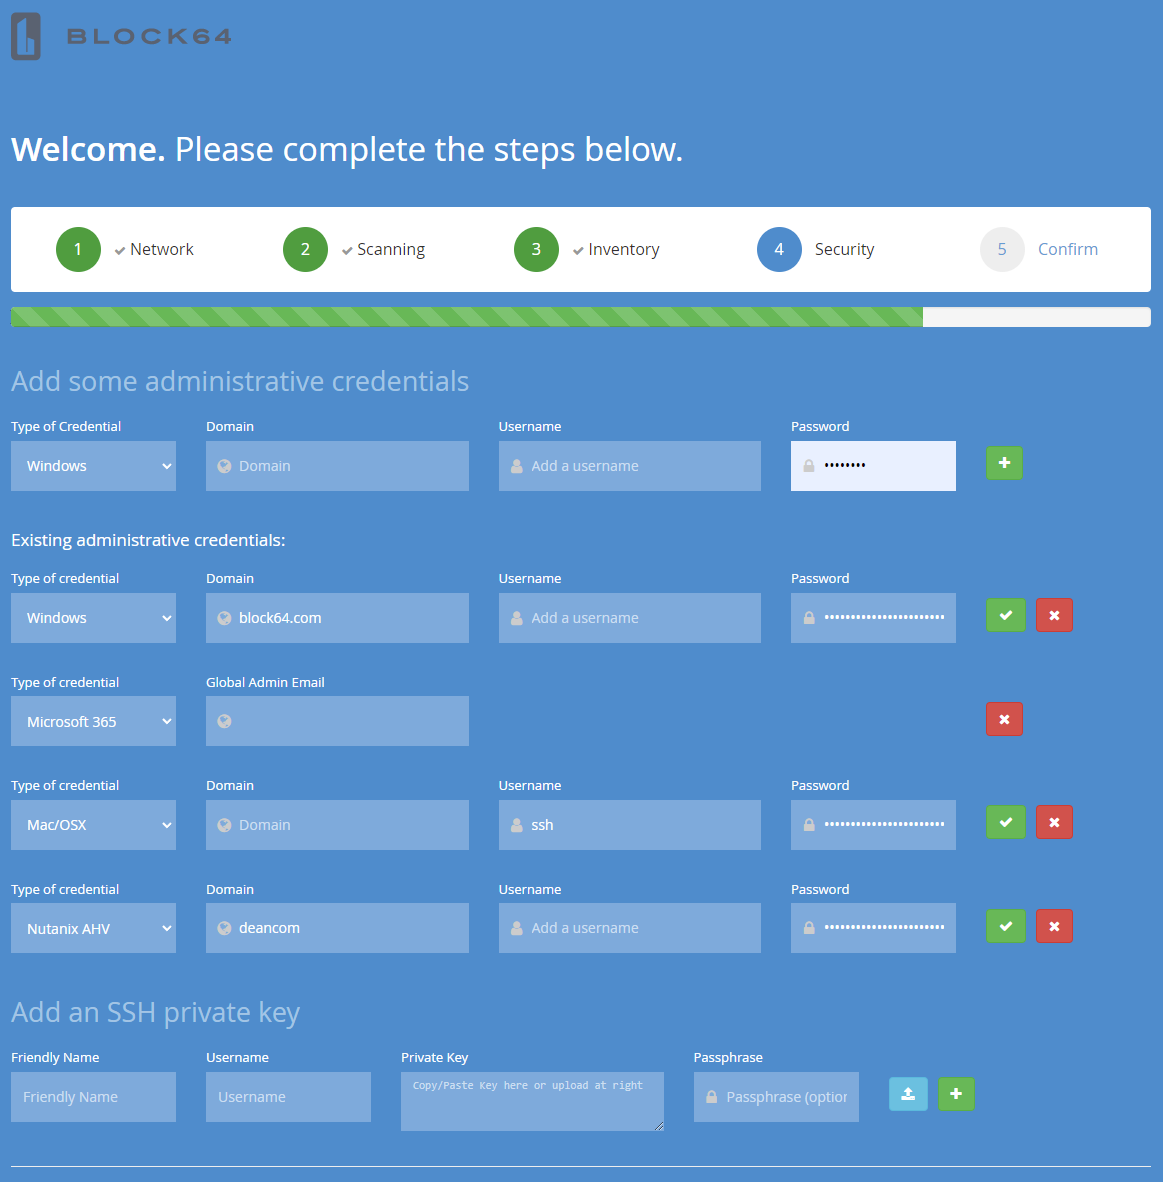
Administrative Credentials
-
Enter OS, Oracle database, and/or SNMP credentials.
-
Click the "+" button to save.
-
For Windows and VMware credentials, BlockBox will automatically test them against the systems in the Inventory tab.
If credentials fail, ensure they are correct and that the systems in the Inventory tab can authenticate them.
Database Credentials
Enter Oracle database credentials, if applicable.
SNMP Credentials
-
For SNMP v1/v2c: Enter the community string.
-
For SNMP v3: Provide the following details:
-
Username
-
Password
-
Context
-
Security Level
-
Authentication & Encryption Protocols
-
Encryption Key
-
Confirmation
You’re all set! Check that the desired settings have been entered and click the Submit button.
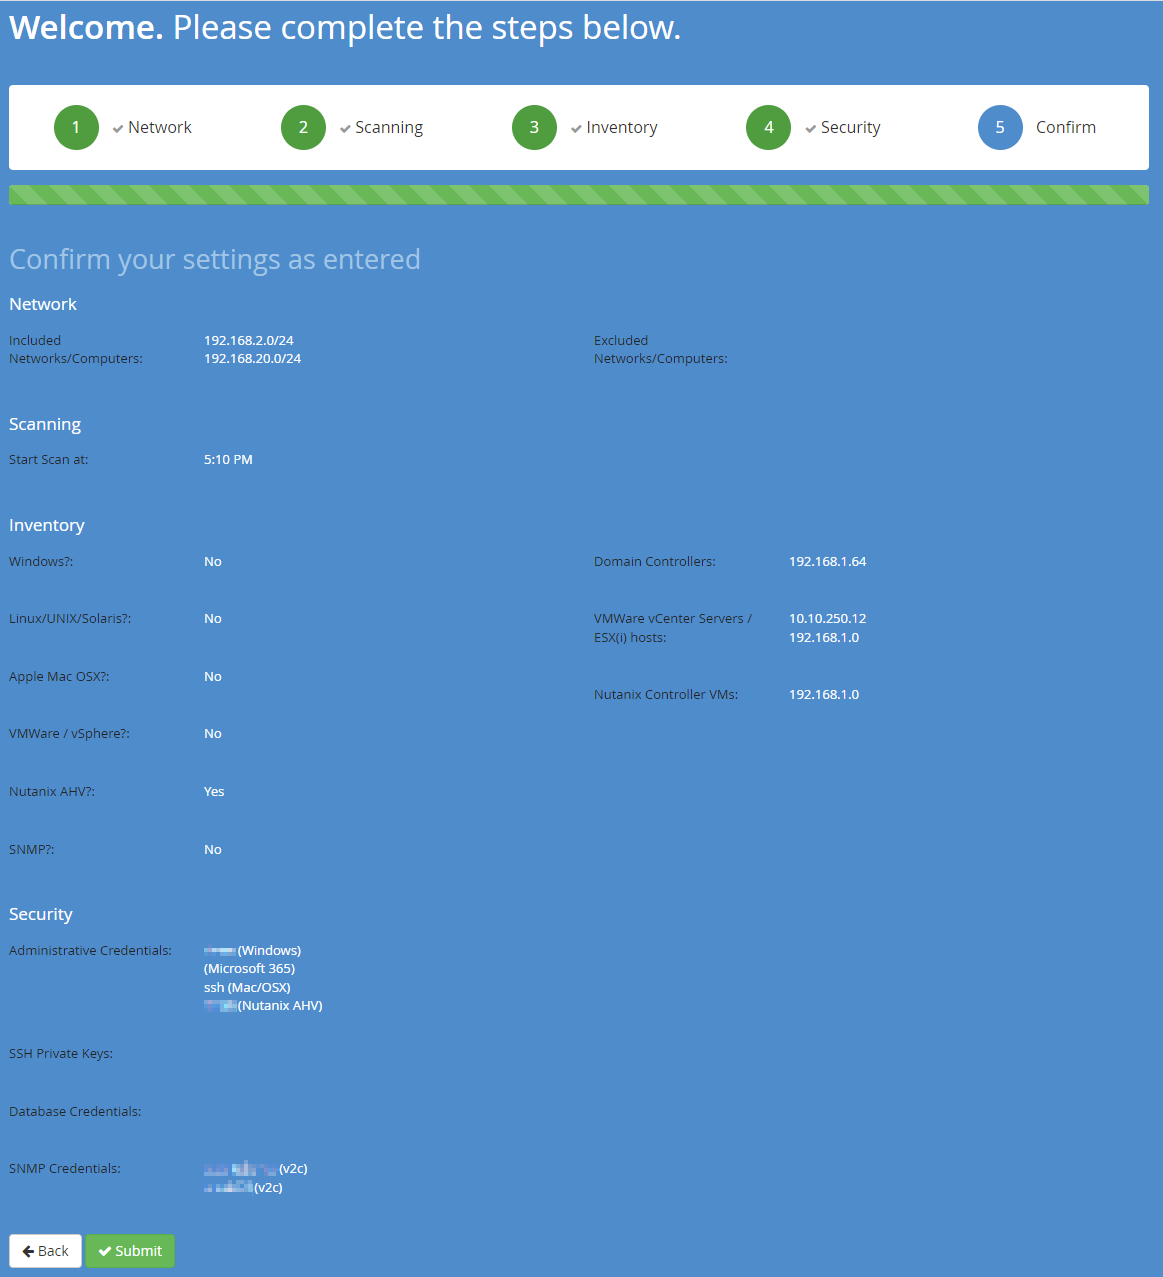
You will be redirected to the Status Screen to monitor the progress of scanning and inventory tasks.
That’s Just About It!
At this stage, you can confidently allow the tool to function autonomously. Within approximately 10 to 15 minutes, devices will begin to populate the 'Discovery Status' report. Should you have any inquiries, or require assistance, please do not hesitate to contact our support team. We are committed to providing a prompt and professional response to address your needs.
