
Once you've signed up and confirmed that the Block 64 Discovery Application suits your needs, you're ready to install and configure it. Below, you'll find a detailed installation video with installation & configuration steps, followed by a step-by-step user guide to help you complete the setup.
Before you begin installation, please review the technical prerequisites and pre-work to verify that your environment meets all requirements for a seamless and successful deployment.
Table of Contents
1. Application Activation
-
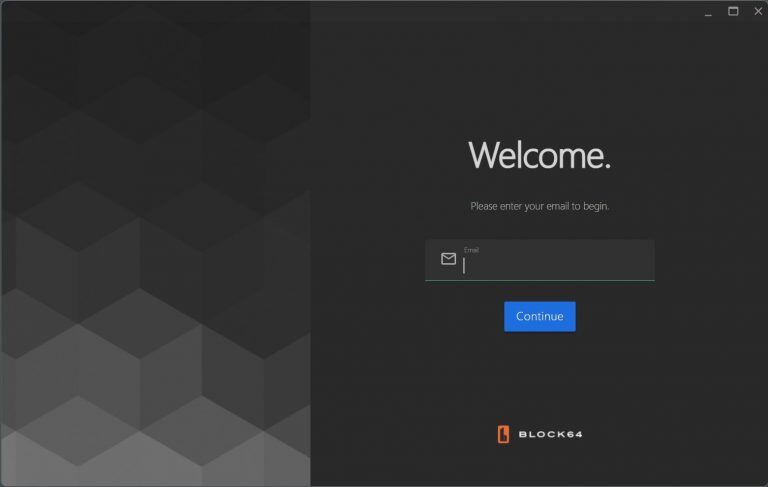
Enter Your Email: Start by inputting the email address you used during the sign-up process.
-
Send Verification Code: Click the "Send Verification Code" button. The system will verify your email; if unsuccessful, you'll be notified.
-
Proceed: If verification is successful, click "Continue" to move forward.
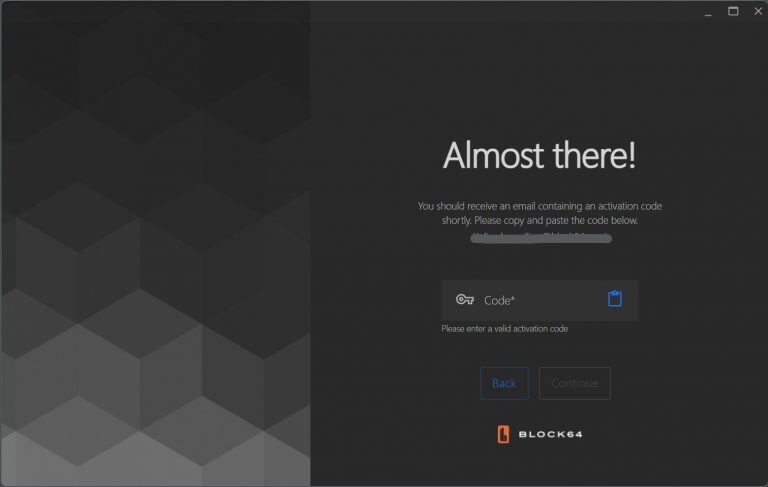
Enter Verification Code
-
Retrieve Code: Check your registered email for a verification code.
-
Input Code: Manually enter the code into the textbox or use the "Paste from clipboard" option.
-
Modify Email: If needed, return to the previous page to input a different email.
-
Continue: After validating the code, click "Continue" to proceed to the inventory method selection.
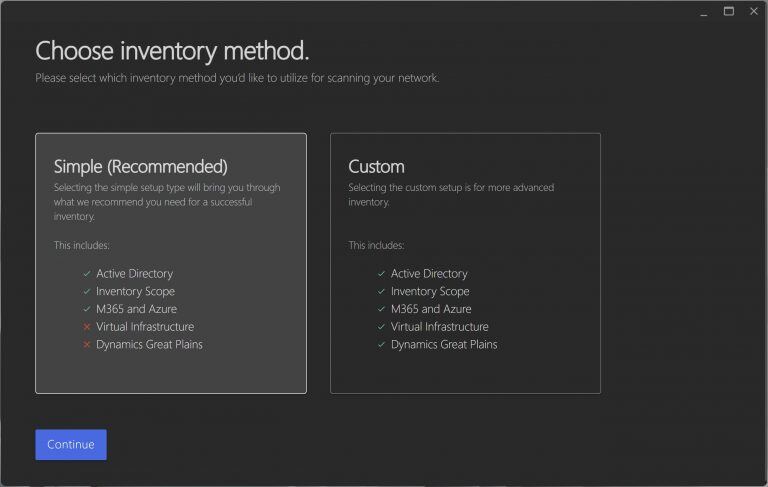
2. Choose Inventory Method
-
Simple Install: Recommended for most users, this method utilizes Active Directory, Inventory Scope, and M365 credentials for a straightforward setup.
-
Custom Install: For advanced configurations, this option includes methods like Virtual Infrastructure, Linux, and Dynamics Great Plains.
Simple Install Method (Recommended)
-
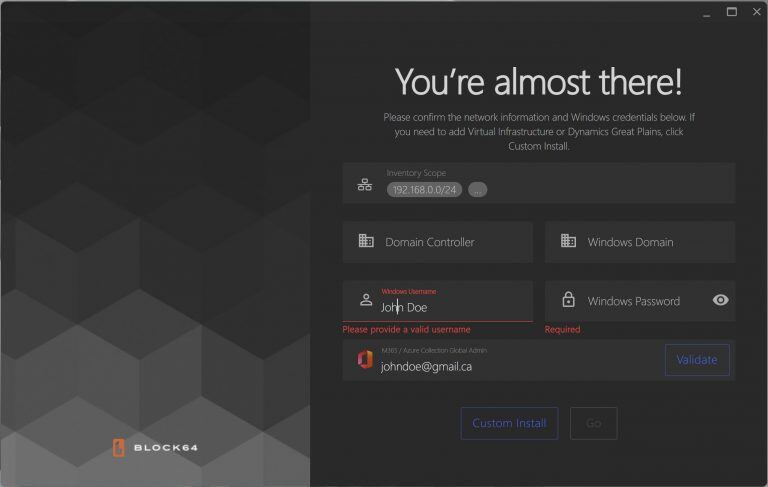
Review Credentials: Ensure your subnets, domain controllers, Windows domains, Windows credentials, and Global Administrator email are correct.
-
Quick Setup: The system may auto-fill details such as Active Directory, subnets, domains, administrator email, and Windows username.
-
Add Subnets: You can include additional subnets at this stage.
-
Validate Credentials: Confirm your Global Domain credentials by entering the corresponding Windows password.
-
Begin Inventory: Once validated, click the "GO" button to start the inventory process.
- Start Inventory: After registering all required information, you're ready to begin the inventory.
You will be taken to the Main dashboard, where you can oversee the inventory progress.
Custom Install Method
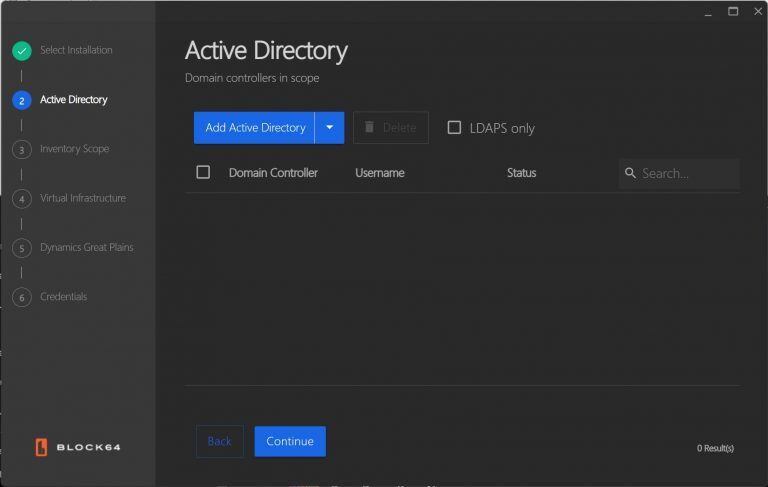
- Add or Search Directories: Select "Add Active Directory" to include a new directory, or search for existing ones.
- Manage Domains: You can add or remove domains using either the FQDN (Fully Qualified Domain Name) or IP address format.
- Provide Credentials: Enter administrator credentials for authentication.
- Validate and Connect: Once validated, the application will connect to your directory and identify the associated subnets.
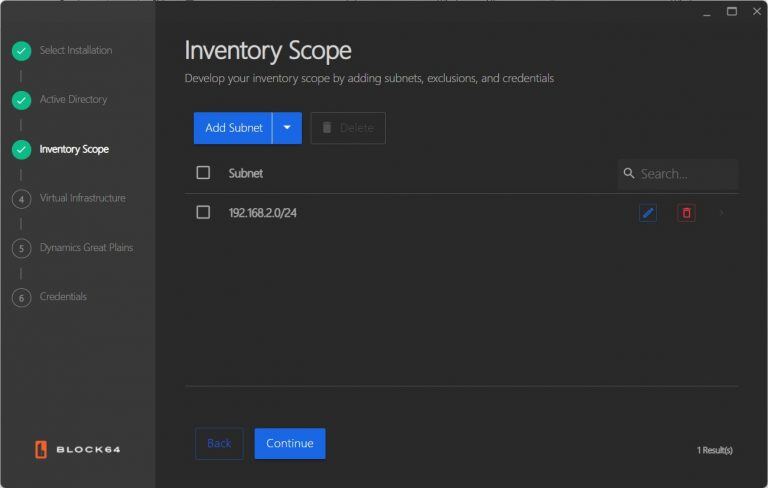
- Inventory Scope:
- Add New Subnets: Click "Add Subnet" and input the IP address or use CIDR notation.
- Exclude Subnets: If necessary, exclude specific IP ranges using the "Add Exclusion" button.
- Edit or Delete: Subnets and exclusions can be updated or removed at any time.
-
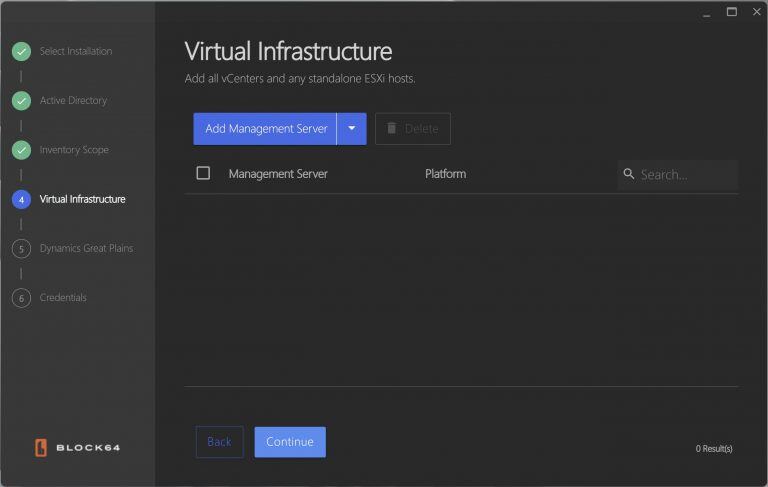
Virtual Infrastructure:
- Add Management Servers: Click "Add Management Server" and provide the server’s IP address or hostname.
- Manage Servers: Servers can be easily searched, edited, or deleted.
-
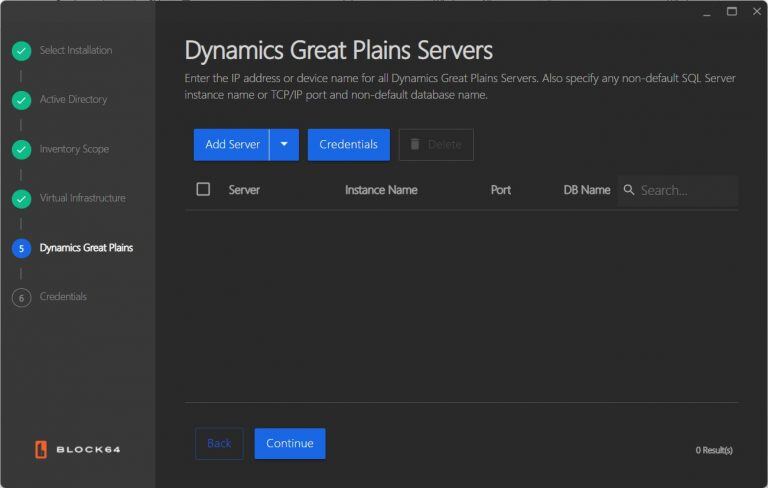
Dynamics Great Plains (DGP) Servers:
- Click "Add Server" within the Dynamics Great Plains section.
- Provide Server Details: Enter the following information:
- IP Address
- Instance Name
- Network Port
- Database Name
- Validate Credentials: Ensure DGP credentials are accurate. Once validated, servers will be included in the inventory.
- Manage Servers: Servers can be searched, edited, or deleted as needed.
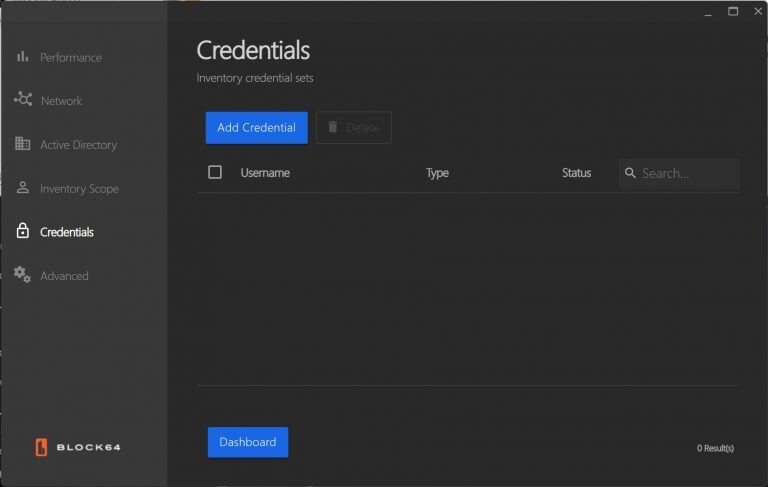
- Centralized Credentials:
Link current credentials with respective services. Credentials are labeled based on username, type, and validation status.
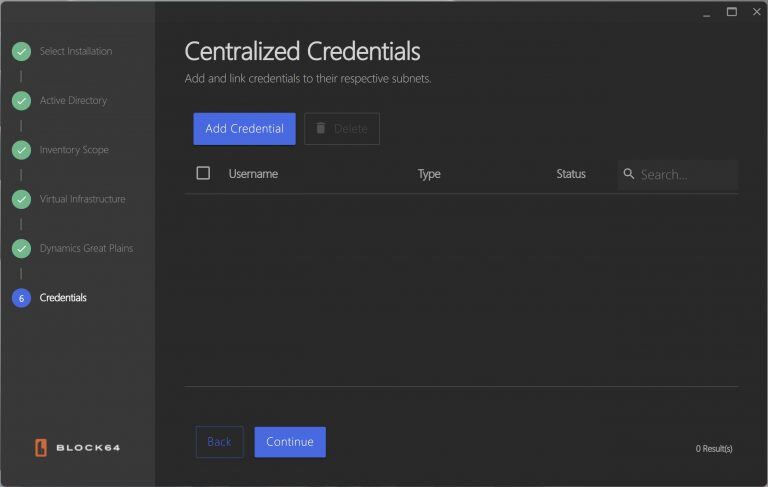
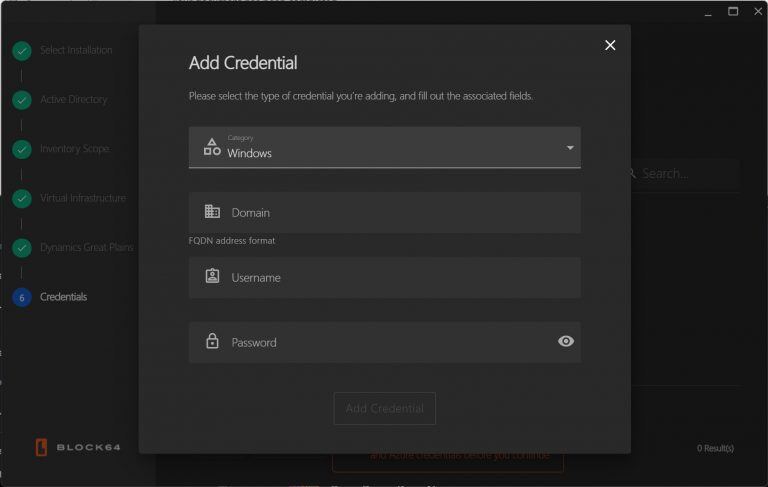
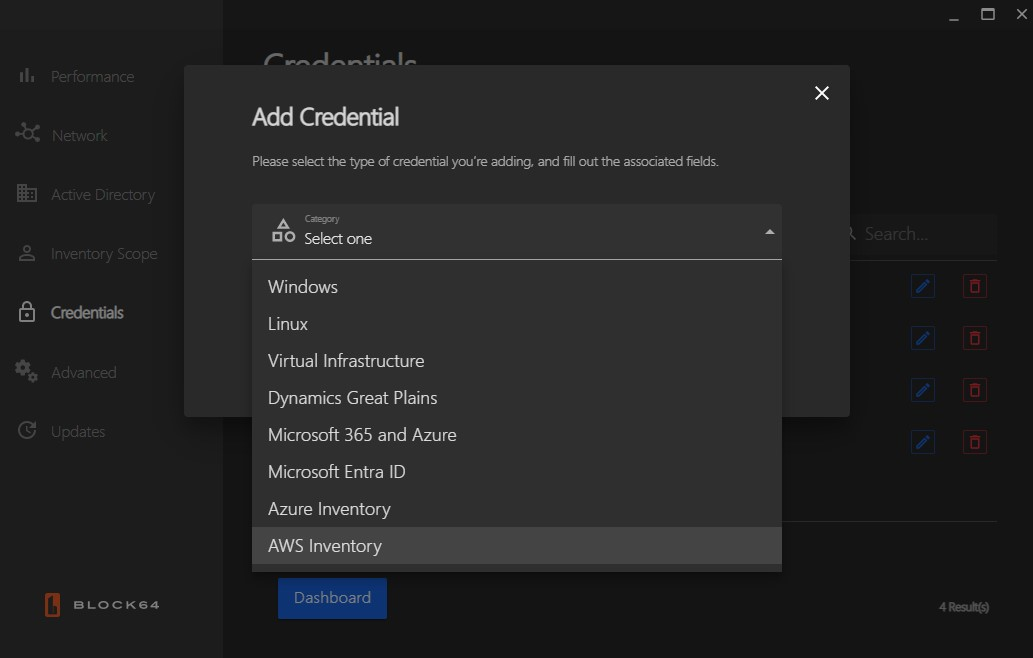
- Add New Credentials: Click "Add Credential" and select the type of credential (Windows, Linux, M365, Virtual Infrastructure, or DGP).
- Enter Details: Provide the necessary username and password. For Linux, you can choose to authenticate using a private key instead.
- Review Status: Credentials are labeled with their validation status for easy monitoring. Invalid credentials will display an error icon with further information.
- Start Inventory: After registering all required information, you're ready to begin the inventory.
3. Dashboard Overview
-
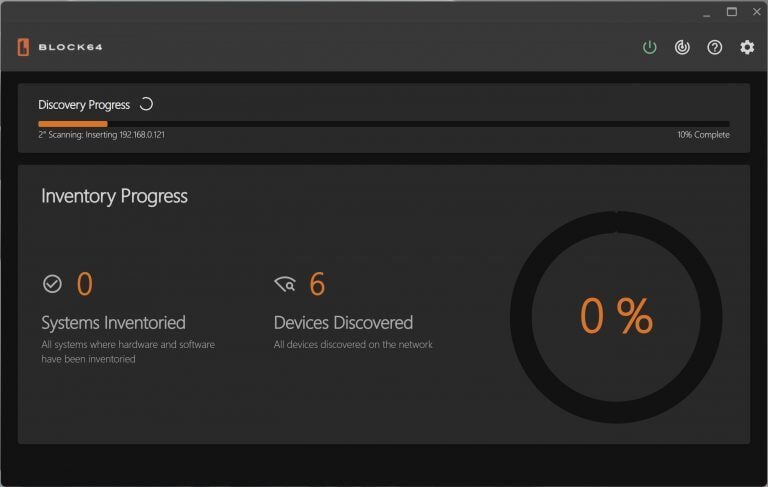
Discovery Progress:
- On the left, it shows the devices inventoried at the subnet level.
- In the middle, it displays the devices found in the local AD that have been inventoried.
- The percentage reflects the devices found in both the local AD and Entra ID.
- You can pause the process using the power button, but keep the tool running for full inventory discovery.
- By default, the tool performs 20 scans before showing 100% completion (adjustable in settings).
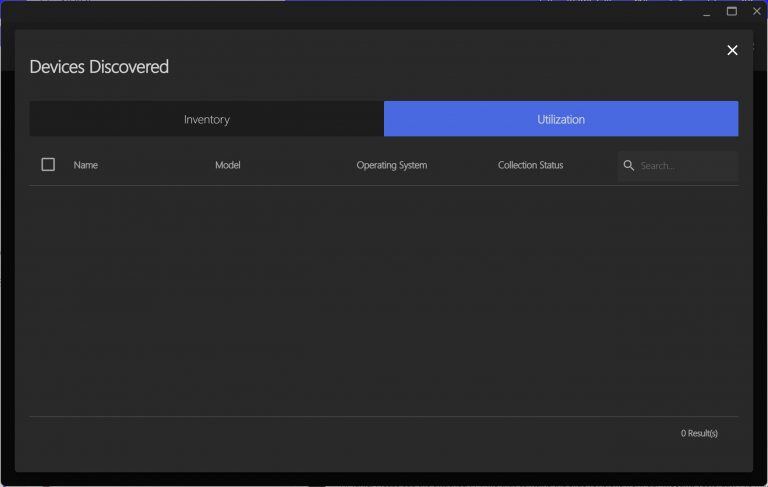
- Inventory Tab:Shows device name, IP address, manufacturer, model, OS, and network status.
- Errors encountered during the scan will appear under the status column once the process finishes.
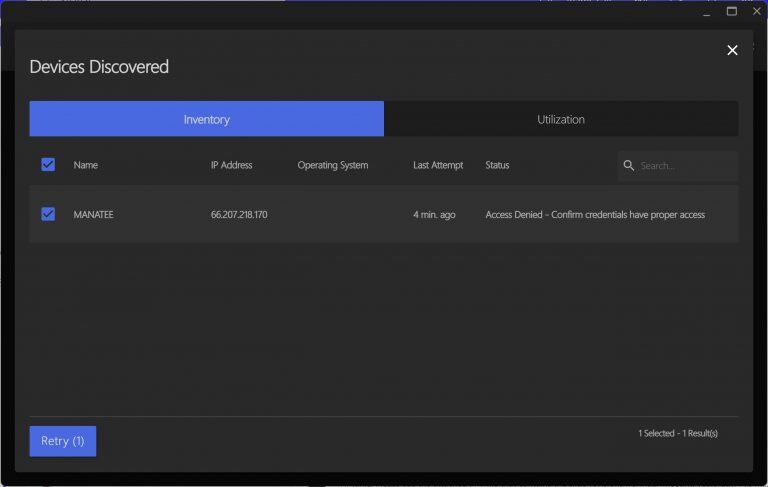
- Utilization Tab: Provides detailed device information. If an inventory attempt fails, you can select devices to add to a queue for re-inventory.
-
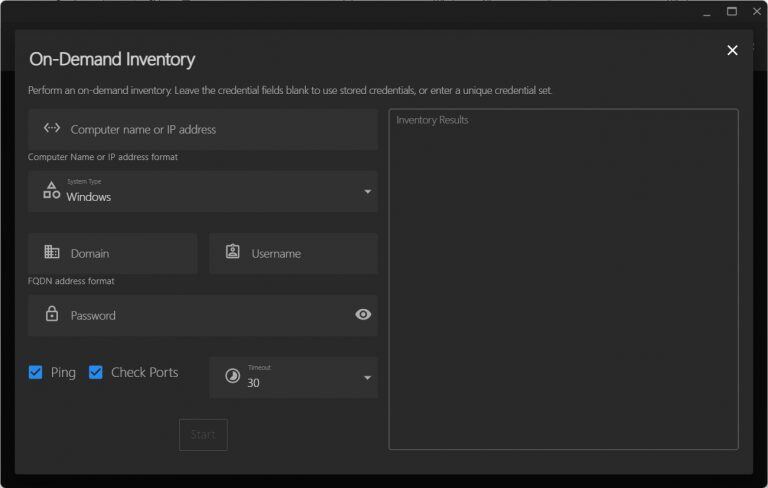
On-Demand Inventory: This feature allows you to perform a targeted inventory of specific devices whenever needed. This is useful for quick checks or troubleshooting without running a full network scan.
- Access On-Demand Inventory: Click the "Scan" icon located at the top right corner of the dashboard.
- Choose Devices to Scan: Enter the device’s IP address or hostname.
- Select Credentials:
- If you’ve previously saved credentials, leave the text fields blank to use them.
- To input new credentials, provide the appropriate Windows or Linux login details.
- Additional Options:
- Enable or disable the Check Ports and Ping options using the checkboxes. These help verify device availability and connectivity before starting the inventory.
- Start Scan: Click the "Start Inventory" button to initiate the scan.
- View Results: Once the scan is complete, the results will be displayed on the right side of the screen, showing detailed device information.
4. Settings
-
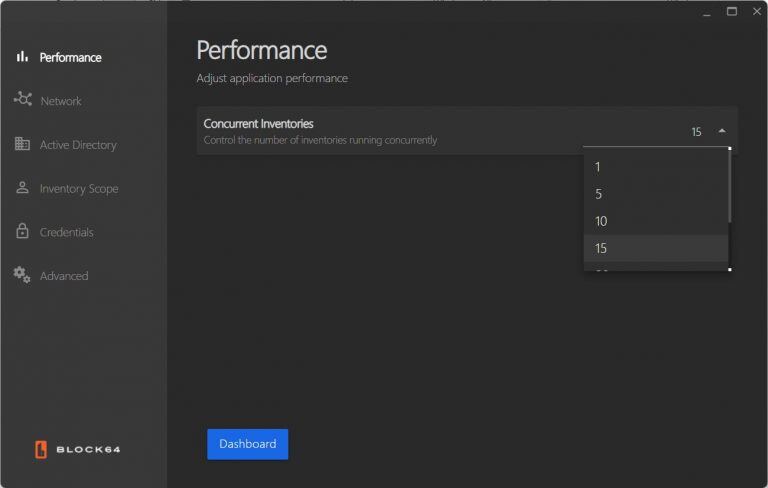
Performance: Set the number of concurrent inventories running from the dropdown menu, ranging from 1 to 30.
-
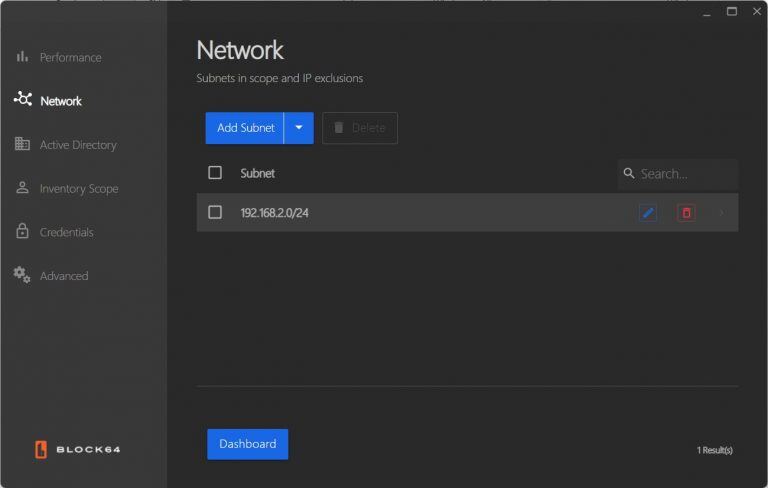
Network Settings
- Manage Subnets: Click the "Add Subnet" button to add new subnets using an IP address or CIDR format.
- Edit or Remove Subnets: Existing subnets can be modified or removed as needed.
- Set Exclusions: You can add exclusion rules using specific IP addresses to prevent those from being included in the inventory.
- Network Overview: All added subnets and their exclusions will be listed for easy management and visibility.
-
Active Directory Settings
- Add Active Directories: Click the "Add Active Directory" button to include a new directory.
- Add or Remove Domains: Enter domains using FQDN (Fully Qualified Domain Name) or IP address format. Provide local administrator credentials for authentication.
- Credential Validation: The application will automatically validate the credentials. Upon success, it will search for associated subnets and inventory the relevant devices.
- Review and Manage Directories: You can search, view, and manage current directories from this section.

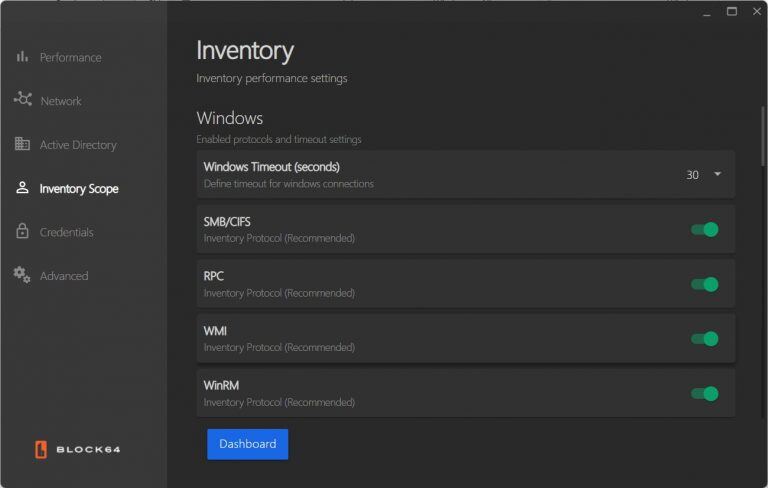
- Inventory Scope Settings
Enable or disable protocols and set timeout settings.
-
- Windows Section: In this section, configure how the application collects inventory data from Windows devices:
- Timeout Duration: Set the connection timeout between 15 to 150 seconds. A longer timeout is ideal for larger or slower networks.
- Inventory Protocols: Enable or disable the following for optimal data collection:
- SMB/CIFS: For accessing shared files.
- RPC: For remote management.
- WMI: For detailed system info.
- WinRM: For secure remote management.
Tip: Keep as many protocols enabled as possible for accurate results.
- WinRM Setup: If required, enable WinRM using a Group Policy Object (GPO) on your domain controller. Follow the provided guide for setup instructions.
These settings help ensure a successful and efficient inventory process.
- Windows Section: In this section, configure how the application collects inventory data from Windows devices:
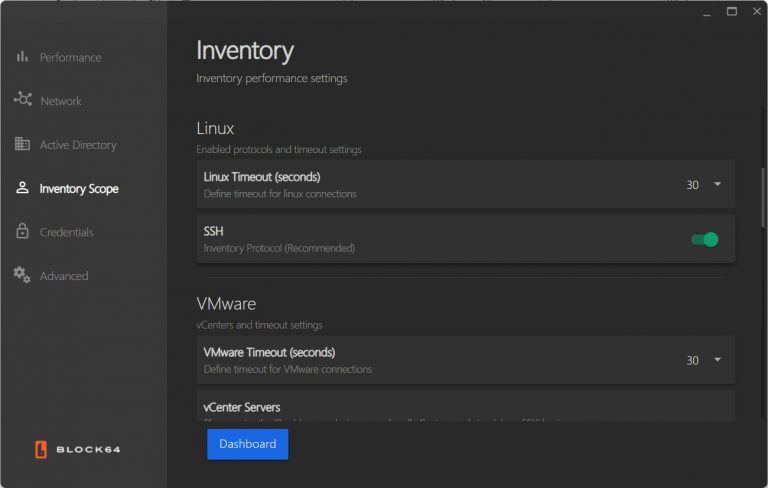
- Linux Section: Set timeout settings via the dropdown menu (15-150 seconds) and enable/disable the SSH inventory protocol.
-
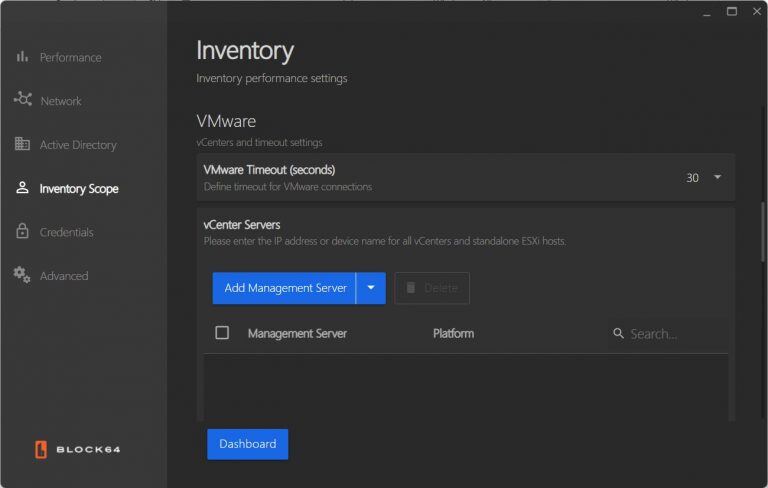
VMware Settings:
-
Configure timeout settings using the dropdown menu, with options ranging from 15 to 150 seconds.
- Add management servers by clicking the "Add Management Server" button.
- Provide the IP address and select the appropriate platform (vCenter or ESXi host).
- Existing management servers can be searched, edited, or deleted as needed.
-
- Resource Consumption:
- Toggle whether the application monitors resource and network utilization on all inventoried devices.
- It's recommended to leave this feature enabled to gather additional device data for more accurate reporting.
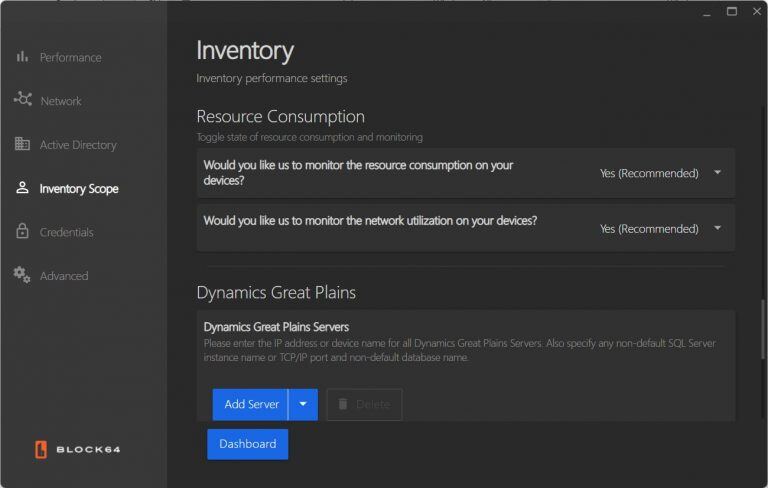
- Dynamics Great Plains (DGP):
- View, search, and add servers by clicking the “Add Server” button.
- Provide details like the IP address, instance name, network port, and database name.
- Validate DGP credentials through the credentials page once input. Servers can also be searched, edited, or deleted as needed.

- Credentials Management:
- Maintain or add credentials by selecting the “Add Credential” button.
- Credentials are labeled by username, type, and validation status.
- Hover over the error icon to view details about failed validations.
- Supported Credential Types:
-
Windows
-
Linux
-
Virtual Infrastructure
-
Microsoft 365
-
Dynamics Great Plains
-
Azure
-
AWS
-
Choose the appropriate type from the dropdown menu.
-
Provide the required username and password to add credentials (Linux users can alternatively add credentials using a private key).
-
Credentials can be searched, edited, and deleted within this tab.
-
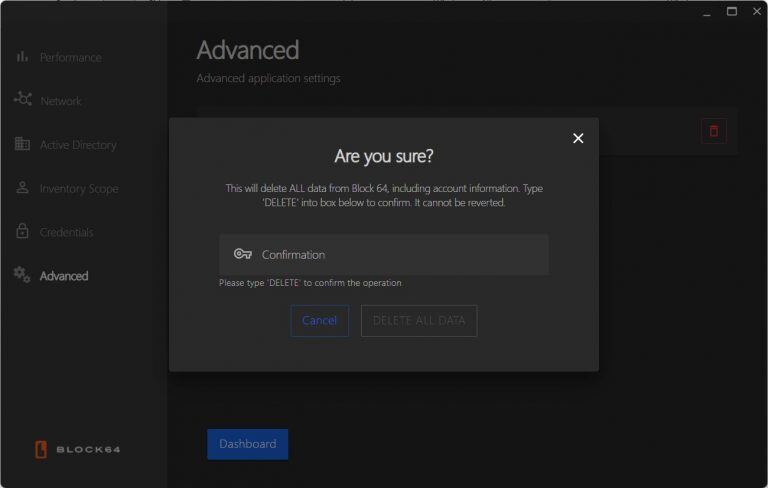
- Advanced Settings:
- Wipe all application data using the "DELETE" command.
- Enter “DELETE” into the provided text field to erase all data collected by the application.
- This action resets the application to its initial state, returning you to the welcome screen.
Need Help?
If you encounter any issues or have questions, explore our troubleshooting articles or reach out to our support team.
Visit the Support Center page for more details.